Tuesday, August 20, 2013

Easy Nail Polish Earrings

A few months ago I saw a very effective and simple way of making some great earrings- and whatever your style is, you can make them 'you'! With your favourite nail polish (or just some that you think would make great earrings) and just a couple of glass cabochons, earrings are born!


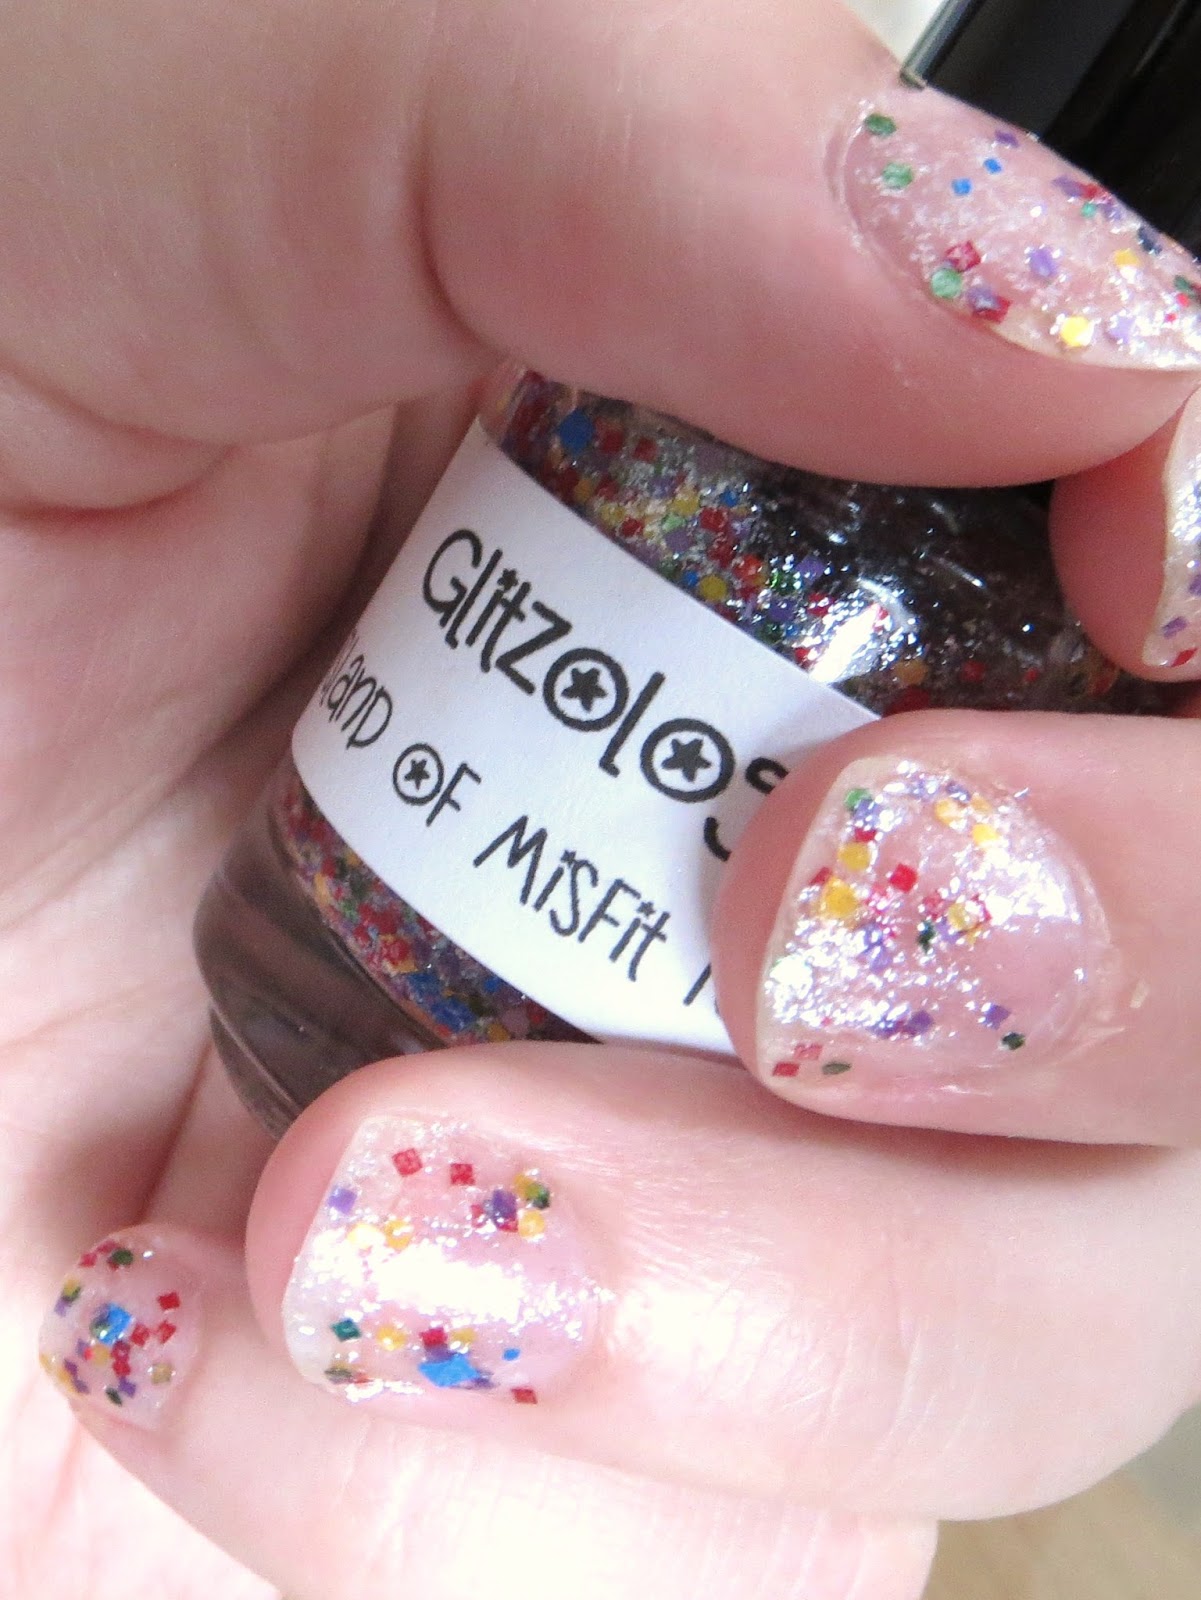
The hardest part is probably picking the nail polish you want to use. But the great thing about this is that if you buy a pack of cabochons, you can make a ton of coordinating earrings. For this tutorial, I used Island of Misfit Toys by Glitzology, a sheer polish with lots of rainbow glitter.


The problem with glitter fingernail polish is that when I work with clay, it tends to come off and spoil the clay, so I don't get to wear it on my nails much. Wearing it as earrings softens the blow a bit!


In addition to the nail polish and the cabochons you'll need a good craft glue and some earring posts that aren't bigger than the cabochons. (They're not pictured, but don't forget the earring backs, either!)


So here it is: Paint the back of your cabochons with nail polish- more coats if you want it to be darker though the silver posts will help it. When they're very dry, carefully glue them to the earring posts (being especially careful if you are using a solvent glue as it'll work like fingernail polish remover and pull the polish from the glass).


And that's it. Great little earrings that will coordinate perfectly. You can also do this with larger glass cabochons and make pendants for a coordinating necklace. 


Cabochons can be found cheaply from most craft stores and online, making these a nice inexpensive addition to your jewelry box- and you'll probably end up making multiple pairs!


What polish will you use? Do you have a favourite?


Saturday, August 17, 2013

July in review

Don't you love finding little 'treasures'? I came here thinking I'd post a different entry and found this one left unposted! So, without further ado- a quick roundup of what I worked on in July (besides a large string of Crafty Creatives makes, of course!)


School in the UK ended in July, so apples were in order- I made these big chunky apple pendants and some half-apple brooches, which went down well with the teachers!


A few bulk orders for July as well- first up was this big pile of charms and keyrings for a school fete- the school's emblem is some oak leaves and acorns with a cross, and the children loved them.


I also made these cute badger earrings (and some charms for bracelets) for the North East Essex Badger Group! They were so so teeny!


Technically I made these starfish last winter, but I only re-found them this summer and turned them into earrings and this tri-pendant necklace. 


Now this was a fun commission. A nice chunky pendant, I made the outside of the box with some layered red and white clay, and carefully shaped each piece of popcorn as it went 'in' the box!


And on the non-foody side of commissions, this little sun pendant went to a little girl who I hoped loved it just as much as mine did!


These, along with pandora-style charms, were another new idea for the month. Pearlescent clays and stamps made some pretty cute pendants!


I also had a request for 'just a pear'- no jewelry findings, just the little pear. I couldn't decide on a size, so I sent both!

I did a few other things, which will be viewable in my shop once my little break is over- and this month has already been very productive!

I'll leave you with the goal and movie/book pages for both June and July- I'll be back on Monday with a quick and easy but fun tutorial!


Wednesday, August 7, 2013

Tutorial: polymer clay pretzel necklace

Using pastels to colour polymer clay is something that I've seen done a lot but never tried. I tried it recently with some burger charms and saw good results, so I thought I'd incorporate it into this month's tutorial- pretzels!


For this you'll need only a small amount of clay (I used Fimo Soft #7 caramel, lightened a bit with white), some sienna pastel, and, if you have it, glass sugar! 


Make a long 'snake' of clay- thicker if you want a soft chewy-looking pretzel, and thinner if you want a crunchy-looking pretzel!


Make a 'U' shape with the snake, and then bring the tops of the loops back down onto the bottom of the 'U', crossing over each other. Don't worry if it's not a perfect shape as you can fix it later. Very carefully flip the pretzel over, using a tissue blade if you want to, and trim the ends as long or as short as you like. If you want your pretzel to look softer, gently press down on the places where the clay meets, otherwise just give them a quick touch to make sure it all holds together. Reshape the pretzel now if it's not quite how you want it.


Here's the fun part. Using a craft knife, scrape the top of the pastel chalk, leaving some dust. Pick it up with a paint brush, being careful not to take too much at once.


Very gently apply it to the pretzel. The pretzel looks more real if you don't cover it too thickly or too evenly, so don't worry about it too much. Keep a piece of clay from the scraps next to you as you do it- I found this helped me gauge how dark my pretzel was going, as it was hard to tell sometimes!


You can see the change in the colour here- I did four pretzels and this was the darkest one. 


Leave the back of the pretzel un-chalked- if you have bits of unwanted chalk dust clinging to the back, it's easiest to scrape or sand them off after the clay has baked, or you may risk smearing it around more than before! Bake your clay now.


If you want your pretzels to look salty, get some of this. It's fake salt/sugar for crafts, made from glass so it doesn't distort when baked with polymer clay. I found mine cheaply on Etsy. A little goes a LONG way.


Varnish the pretzels, and as soon as you varnish the tops, sprinkle a little bit of the craft salt on top so it sticks to the wet varnish. Let it dry, and then add another thin layer of varnish to help secure the salt so it won't brush off when worn.


I liked my fat soft pretzels better when I was doing the first steps, but when finished this skinny pretzel was by far my favourite. Once the varnish has dried, all you need to do is find a big enough jump ring to go around one of the loops of the pretzel, and it's ready for a chain!


These were very quick and easy to make, and just look how CUTE the necklace is! If you can't find craft sugar, you could probably also make salt by grating a piece of baked translucent clay, but it won't be quite as translucent as this glass sugar.

I have a few tutorials to catch up on- so if you'd like to see me attempt anything new or show you how I do something, please let me know! <3